Image management
All of the site's images in one place — upload them, tag them, see where they are used, and delete those not in use
Image management holds every image this site uses: images you uploaded, images generated by AI, and product images, whether they are used in LINE rich menus, LINE broadcasts, store settings or products.
Start with "In use" or "Unused"
Each image shows where it is currently used. Images in use cannot be deleted ("Delete" cannot be clicked when one is selected). When you need to free up space, start from "Unused" on the left.
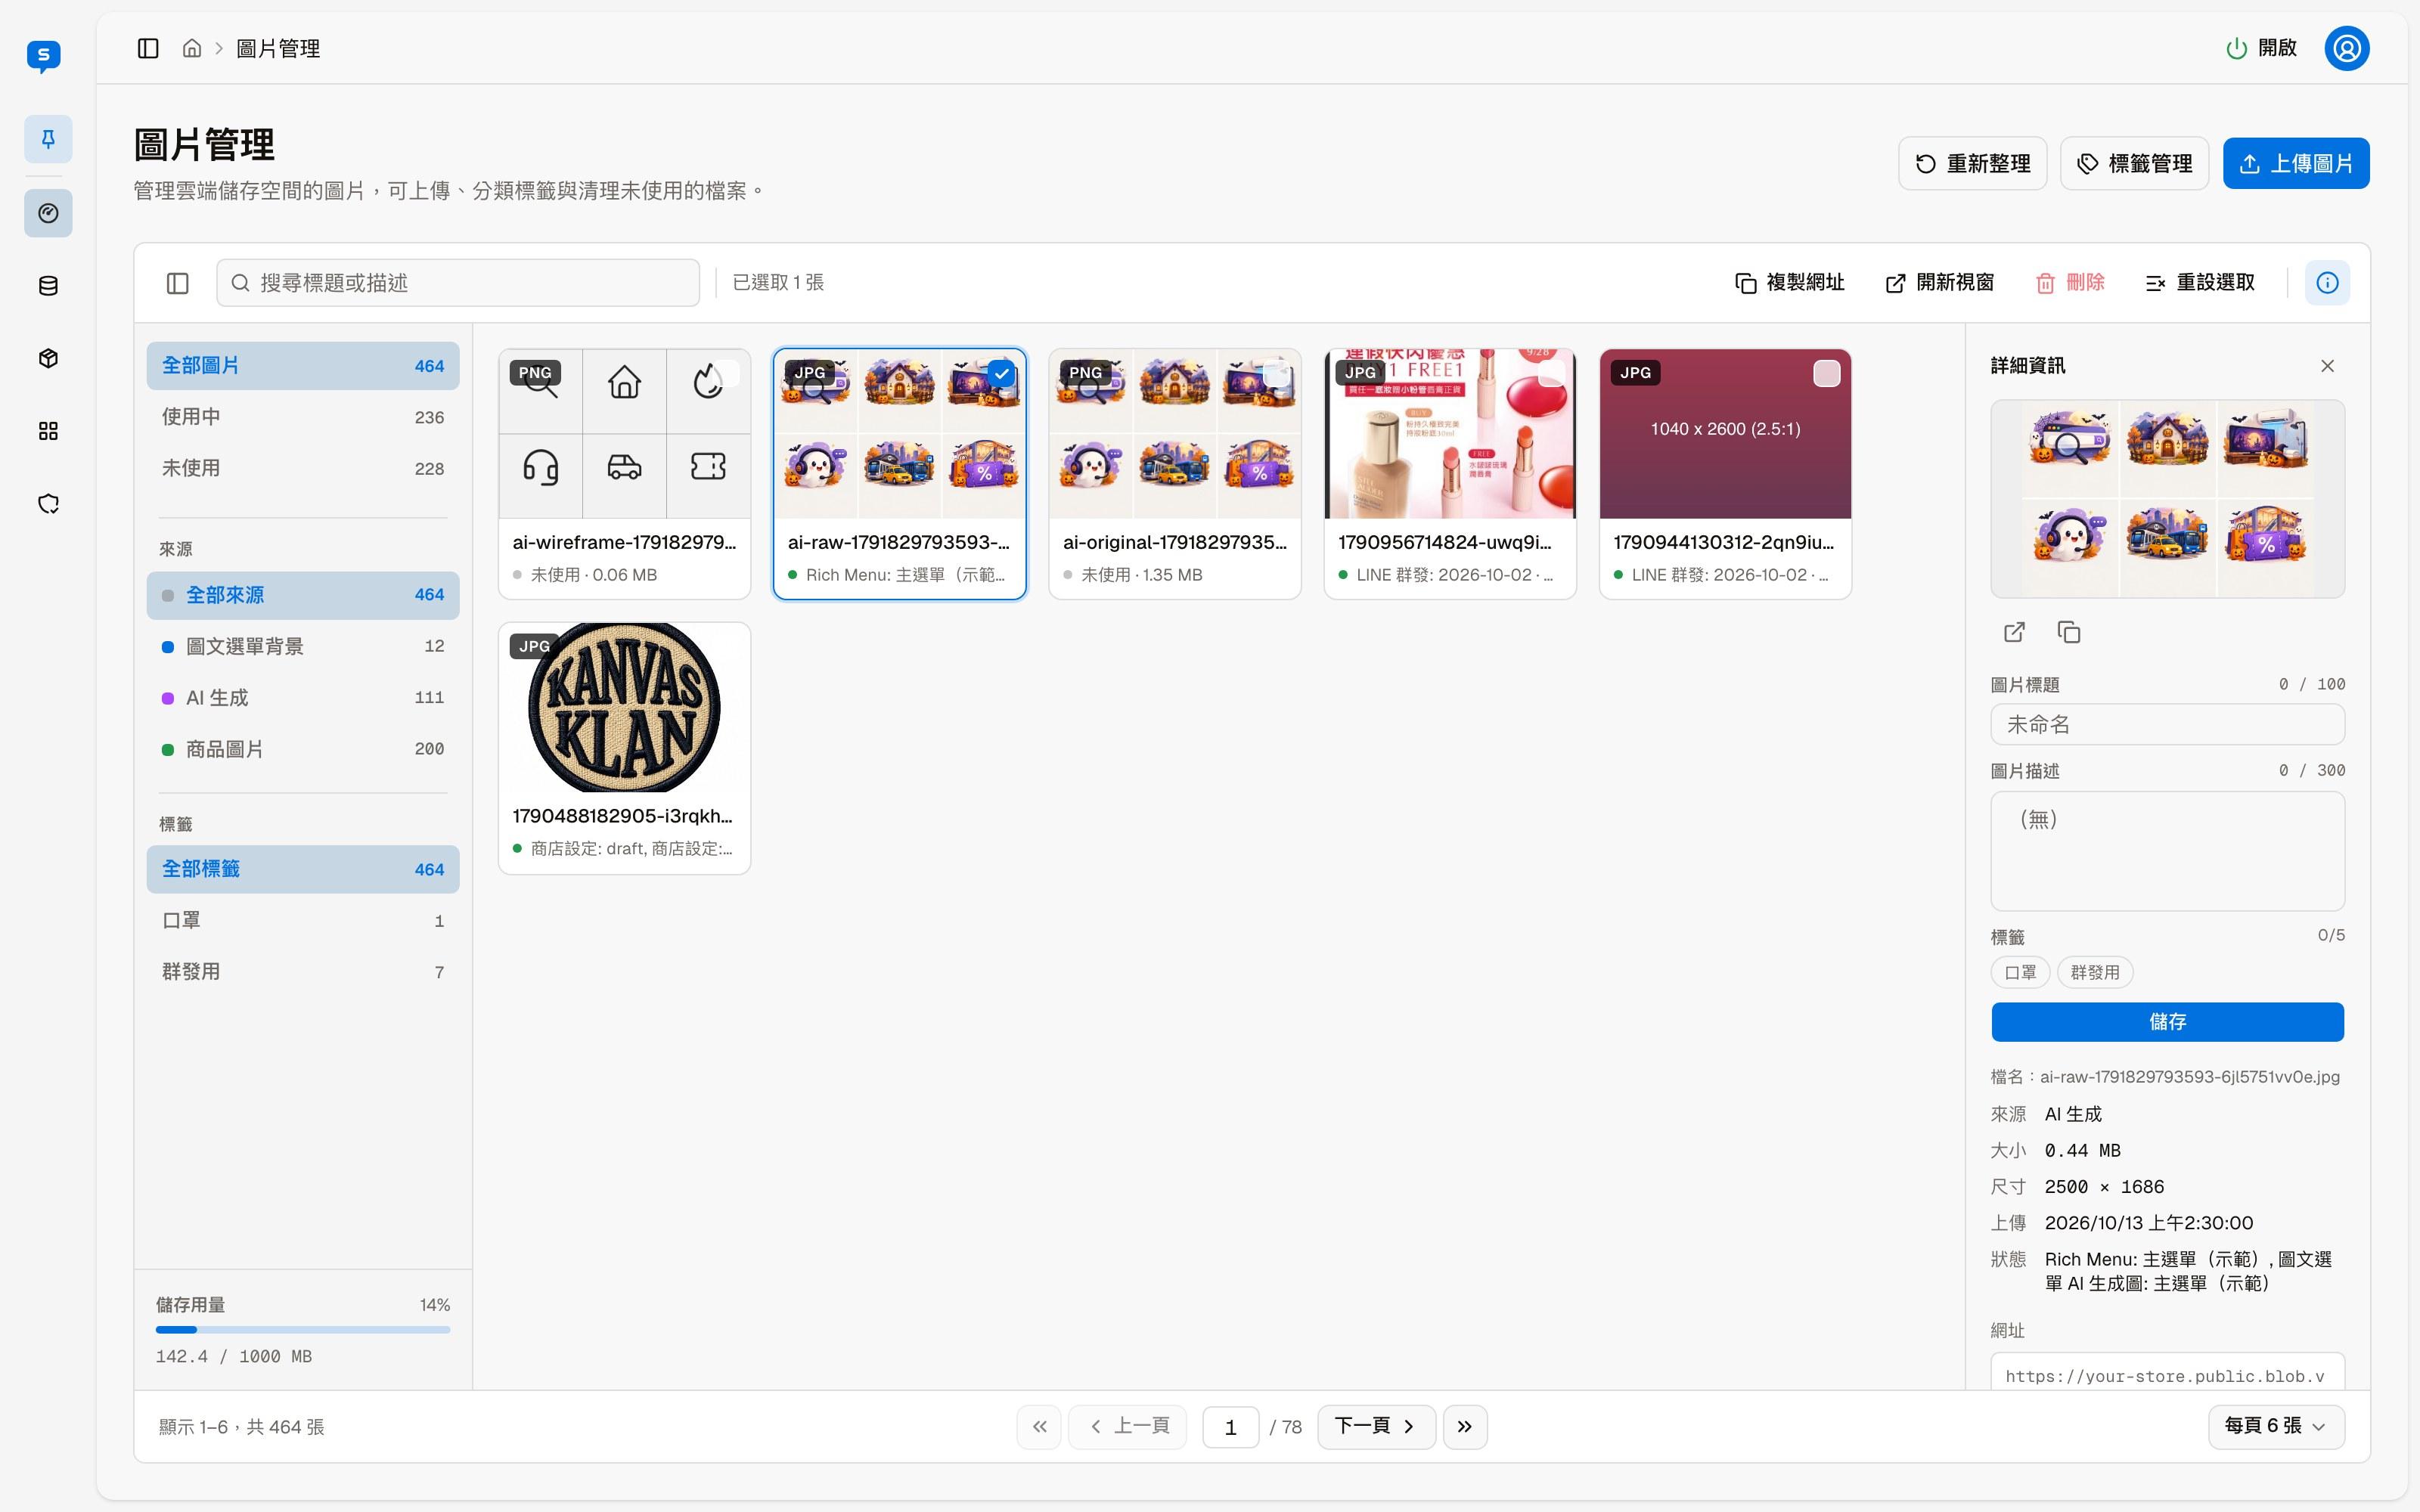
The screen has three columns: filters and storage usage on the left, the images in the middle, and the details of the selected image on the right.
Header and toolbar
| Button | What it does |
|---|---|
| Refresh | Reloads the images |
| Manage tags | Add, rename and delete tags (see "Tags" below) |
| Upload image | Upload new images (see "Upload image" below) |
The toolbar above the images:
| Item | What it does |
|---|---|
| The leftmost button | Collapses or expands the filter column on the left |
| Search title or description | Finds images by their title or description |
| N selected | How many images are selected |
| Copy URL | Copies the URL of the selected image |
| Open in new window | Opens the selected image in a new tab |
| Delete | Deletes the selected images after asking for confirmation. Not available for images in use |
| Reset selection | Clears the selection |
| ⓘ at the far right | Shows or hides the details on the right |
Until an image is selected, Copy URL, Open in new window, Delete and Reset selection cannot be clicked.

Filters and storage usage
The filter column on the left has three groups, each item with its image count:
- Status: All images, In use, Unused
- Source: Rich menu background, AI generated, Product image
- Tags: the tags you created
Storage usage at the bottom is the space all images take up and the limit, the same as "File storage" under "Total limits" in Subscription. When space is running out, start cleaning up from the "Unused" images.
Images
Each image shows its format (JPG, PNG and so on), its filename, a green dot with where it is used (for example "LINE broadcast: 2026-10-02"), or a gray dot and "Unused" when it is not used anywhere, and finally its file size.
Click an image to select it: a check mark appears at its top right and its details are shown on the right. You can select several images at once. The bottom has paging and a setting for how many images to show per page.
Details
| Item | Description |
|---|---|
| Preview and two small buttons | Open the image in a new tab, or copy its URL |
| Image title, Image description | Your own title (100 characters) and description (300 characters), to make images easier to find |
| Tags | Click the tags to add, up to 5 |
| Save | Saves the three items above |
| Filename, Source, Size, Dimensions, Uploaded | The image's basic information |
| Status | Where the image is used; "Unused" when it is not used anywhere |
| URL | The image's public URL |
Upload image
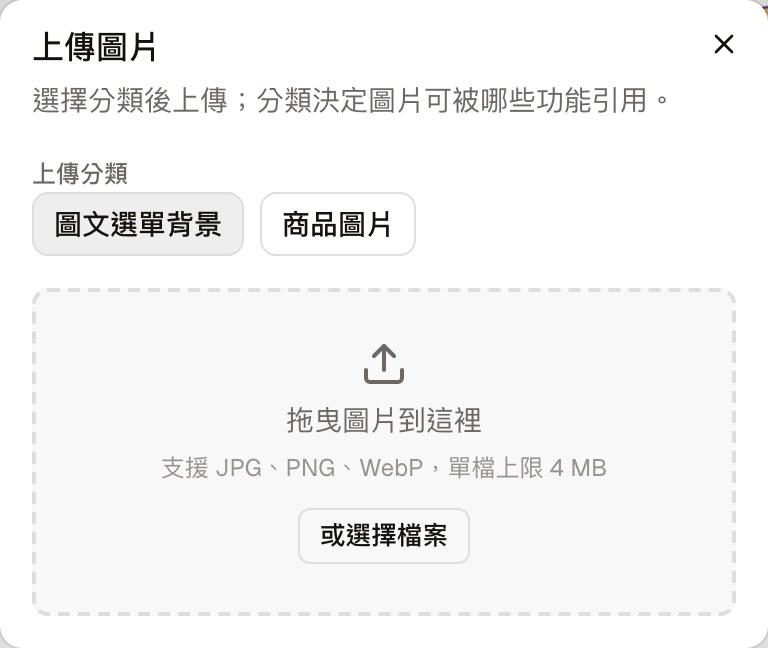
Choose an Upload category first, then drag images into the dashed box or click "or choose a file". JPG, PNG and WebP are supported, up to 4 MB per file.
| Upload category | Description |
|---|---|
| Rich menu background | Background images for LINE rich menus |
| Product image | Images for products |
The category decides which features can use the image; after uploading, it appears under the item of the same name in "Source" on the left. AI-generated images are produced by the features that use them and are not uploaded here.
Tags
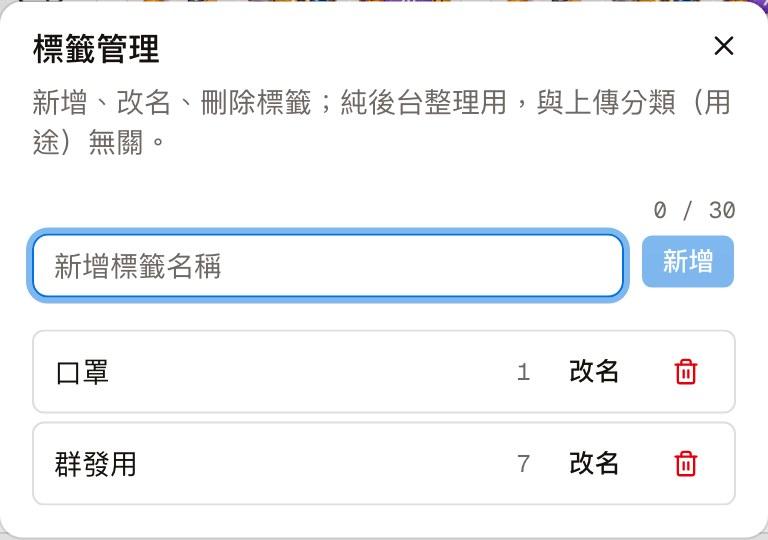
Tags and upload categories are different things
The upload category decides which features can use an image. Tags are purely for organizing images in the admin; whether or how you tag an image does not affect where it can be used.
In "Manage tags", enter a name (up to 30 characters) and click "Add" to create a tag. Each tag shows how many images use it; you can "Rename" it, or click the trash icon to delete it.