Overview
What a rich menu is, and how many steps there are between a draft and customers seeing it
A rich menu is the row of image buttons at the bottom of a LINE chat. Customers tap one to send a message or open a web page, without typing anything.
A rich menu is made of three things: a background image, a few tappable button cells, and the line of hint text at the bottom of the chat (the chat bar text). The background image can be your own picture, or one made with AI-generate beautified image.
Rich menus are only visible in the LINE mobile app
Rich menus do not appear when customers chat in LINE on a computer. Check your menu in the mobile app.
Finishing a menu does not mean customers see it — there are three steps
- Save — saves it as a draft, only in the admin; nothing happens on LINE
- Sync to LINE — uploads it to your LINE Official Account, but customers still cannot see it
- Set as default — from this moment on, all LINE users actually see this menu
All three steps are buttons on this page or the editor; if you miss any of them, the menu does not take effect.
To sync, LINE must already be connected in Channels — rich menus are uploaded with that Channel Access Token.
What the list shows
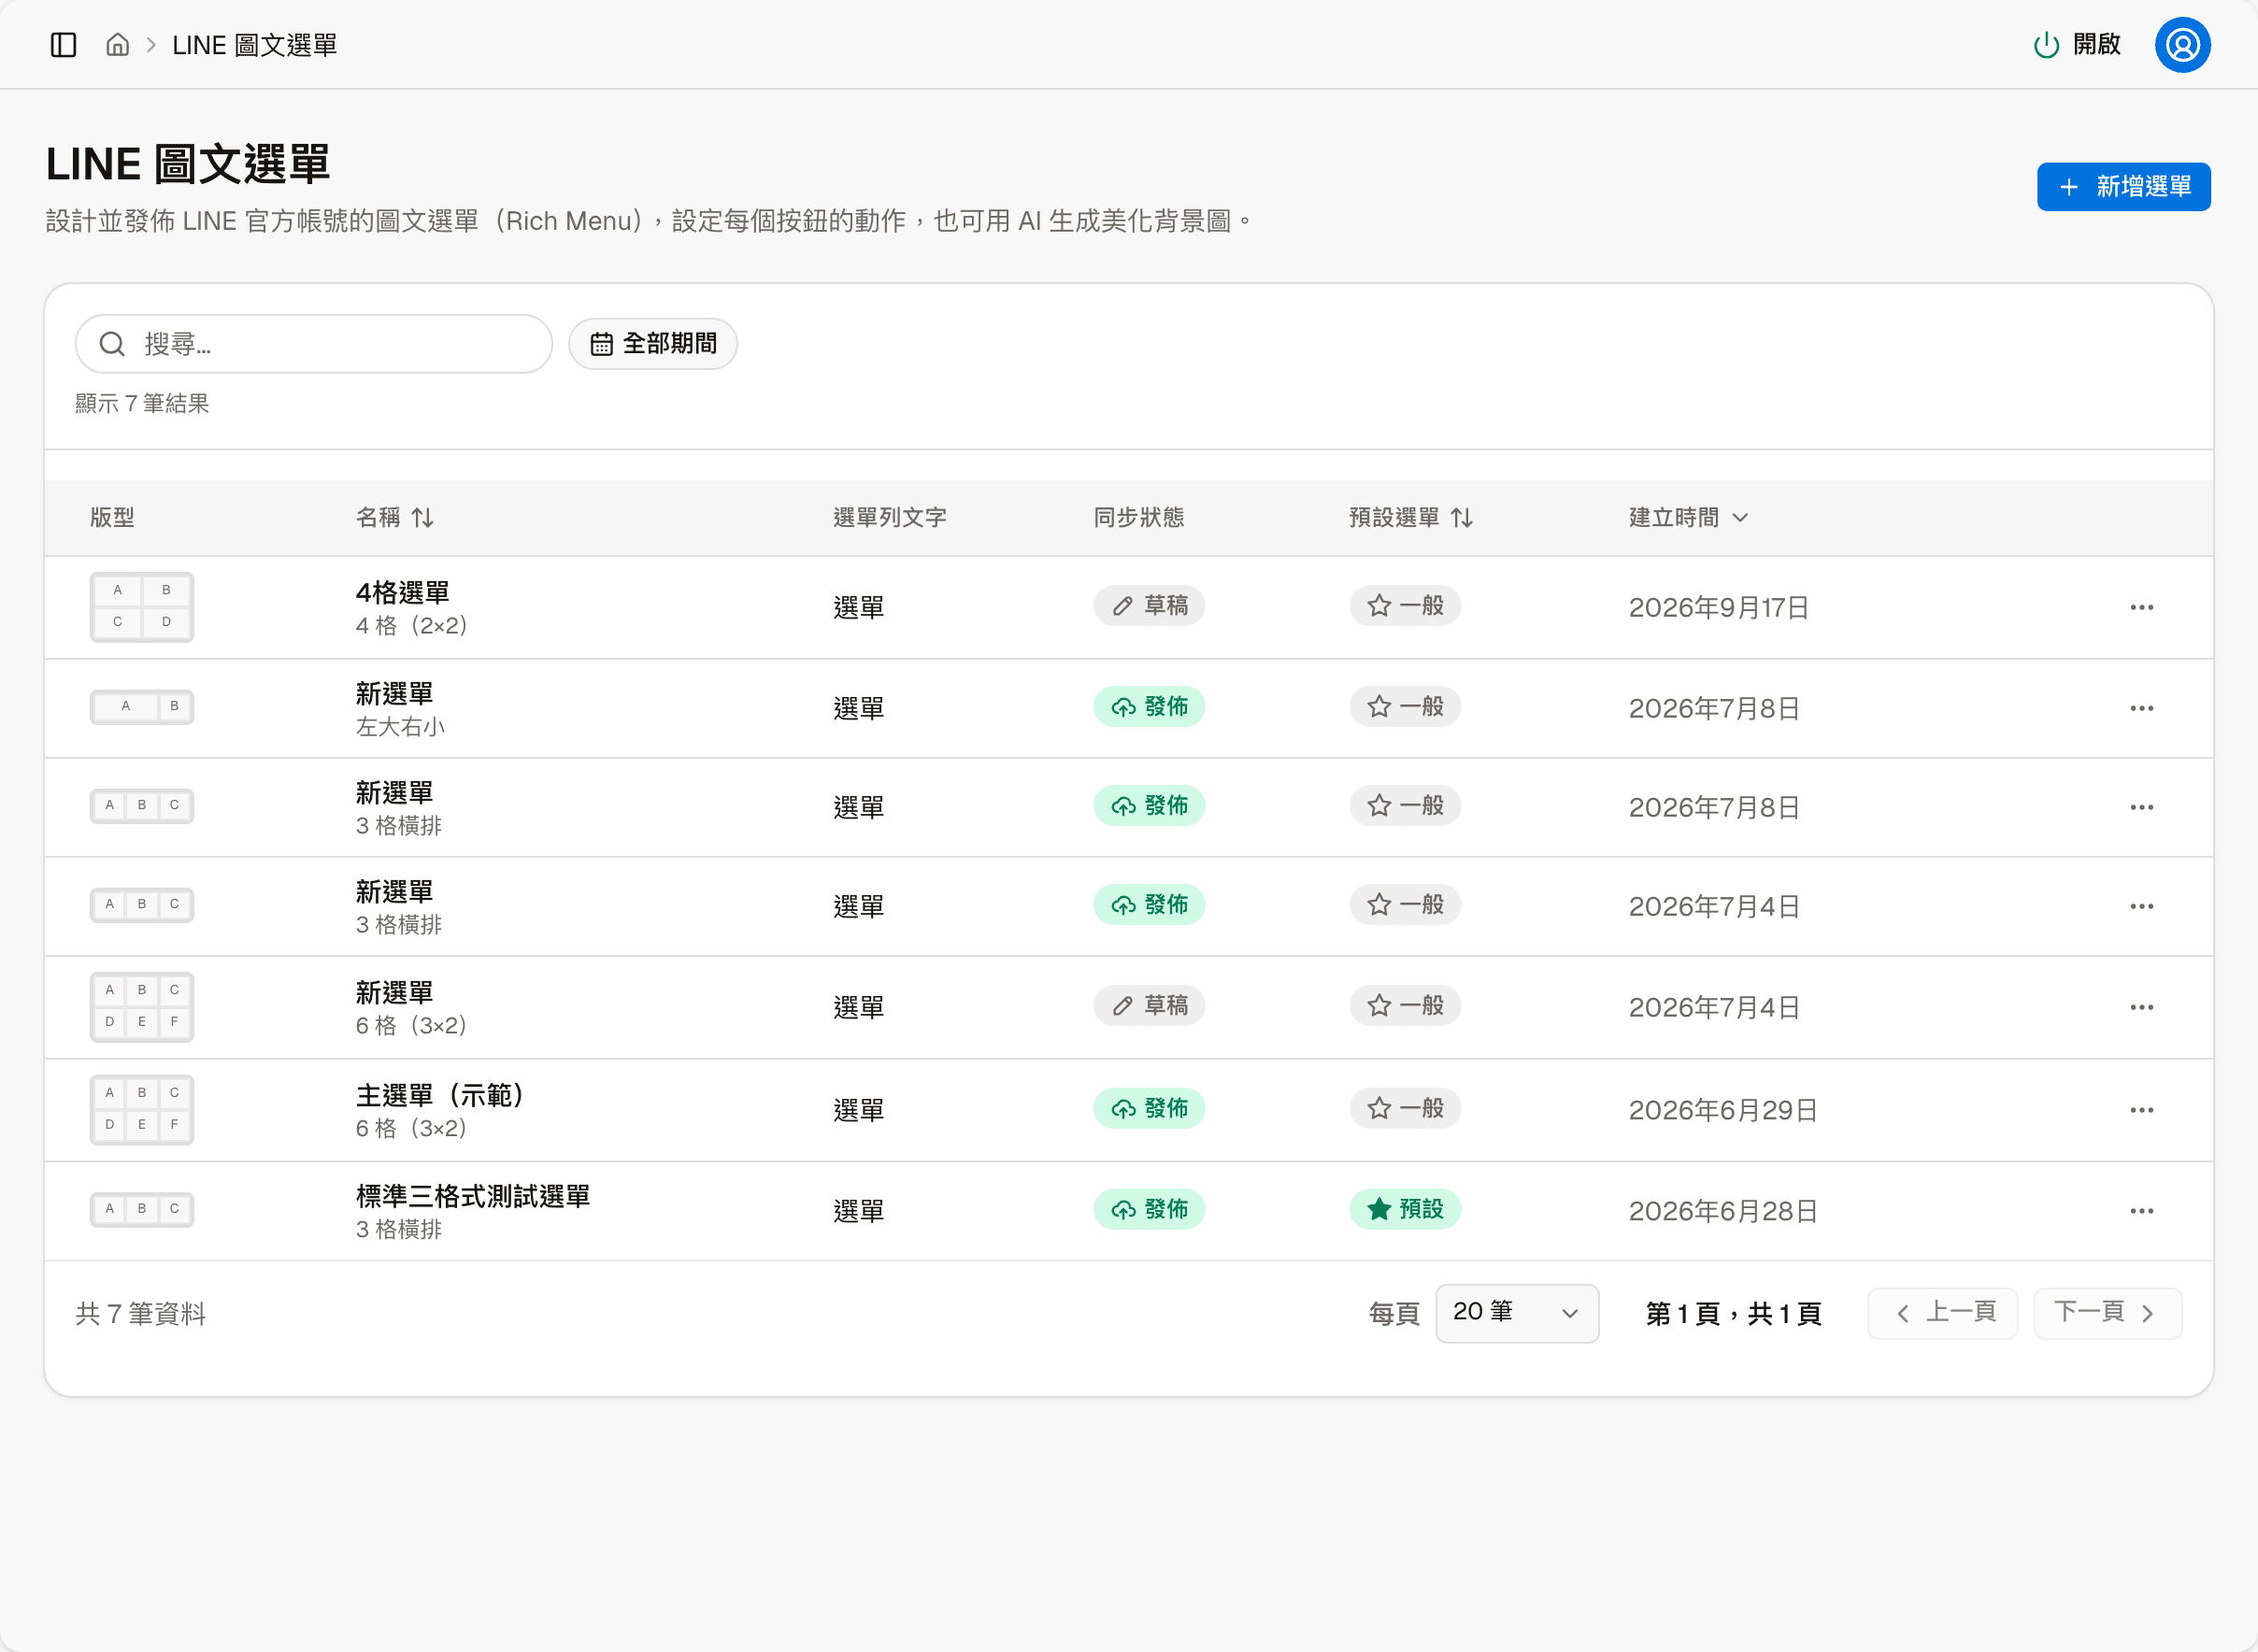
| Column | Shows |
|---|---|
| Layout | A thumbnail; the letters in the cells match buttons A, B, C… in the editor |
| Name | The name you gave it, with the layout name on the line below |
| Chat bar text | The line of text at the bottom of the chat |
| Sync status | Draft, or already uploaded to LINE |
| Default menu | Only the menu marked "Default" is the one customers see |
| Created at |
Above the list you can search, or filter by created period (All time, Last 7 days, Last 30 days, Last 90 days); Name, Default menu and Created at can be sorted.
"Published" does not mean customers can see it
When Sync status shows "Published", it only means this menu has been uploaded to LINE. What customers actually see is the menu marked Default in the Default menu column.
There is only one default menu at a time. Setting another menu as default replaces the current one.
What you can do with each menu
Open "More actions" on the right of each row:
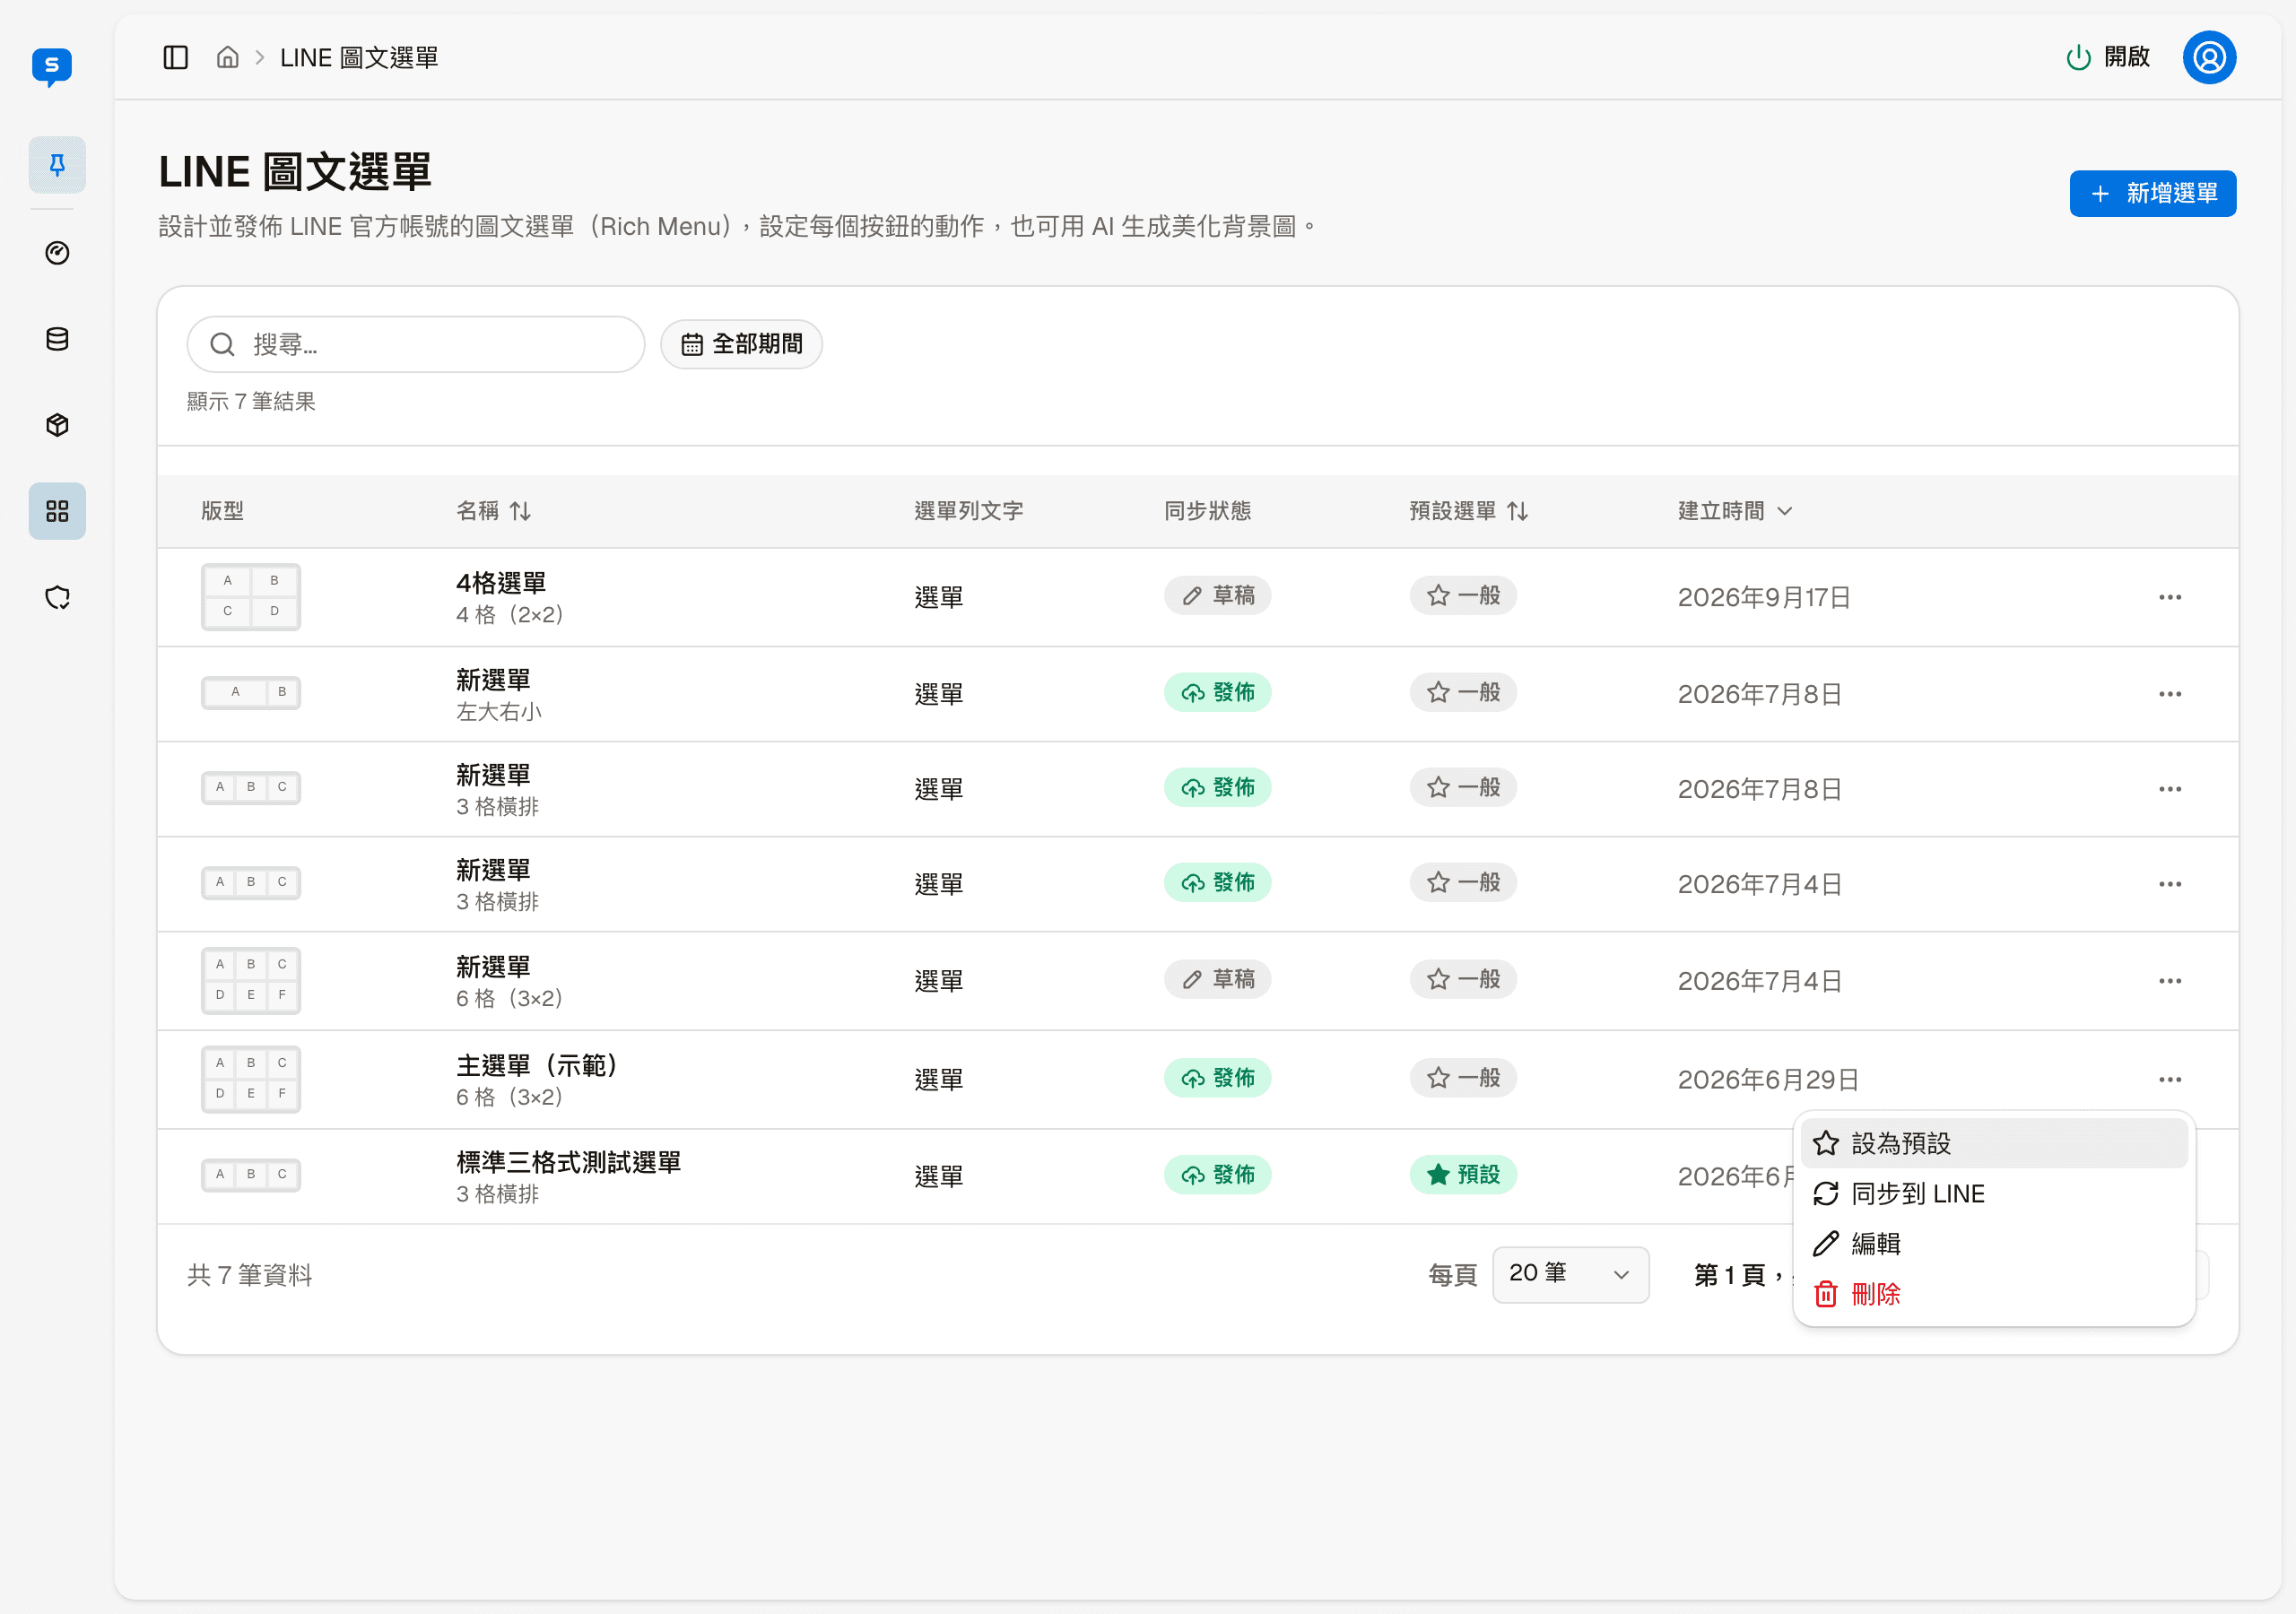
| Action | Description |
|---|---|
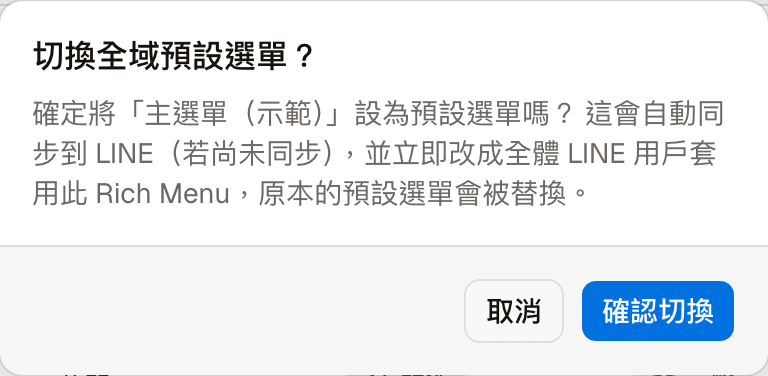
| Set as default | Makes customers actually see this menu. Asks for confirmation first; a menu that has never been synced is synced to LINE automatically after you confirm. Not available for the menu that is already the default |
| Sync to LINE | Uploads the current content to the LINE Official Account. It uploads as soon as you click, without a confirmation; a message appears when done, and if this menu is not the default yet, the message reminds you that LINE users cannot see it yet |
| Edit | Opens the editor to change the name, buttons, style and background image |
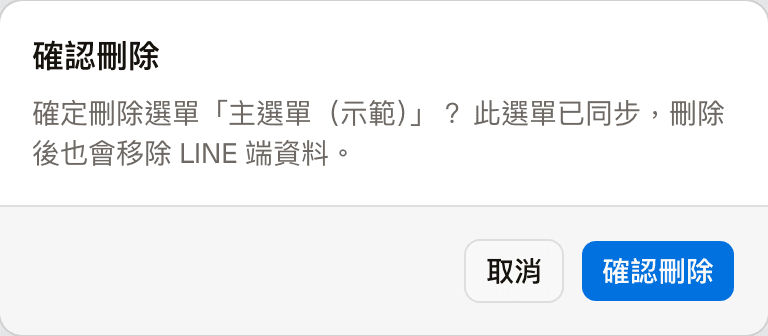
| Delete | Asks for confirmation first. For a menu that has been synced, the copy on LINE is removed as well |
New menu: choose a layout first
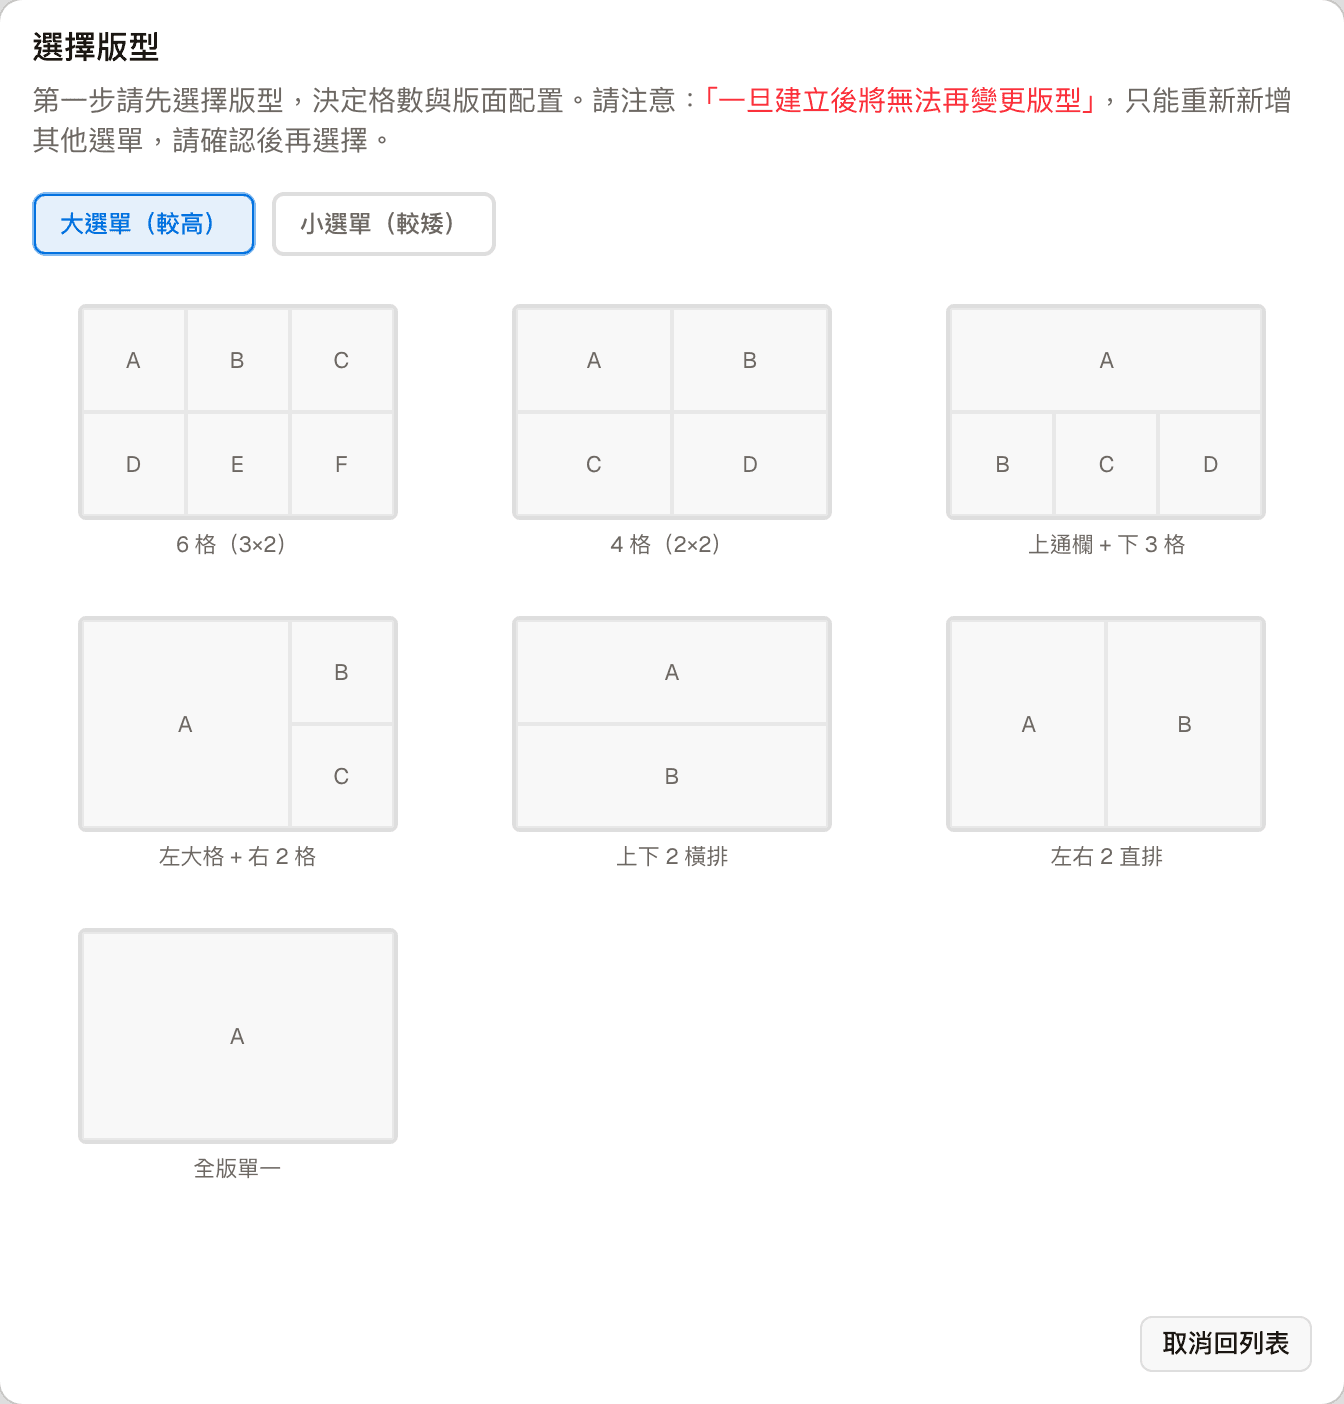
The first step of "New menu" is choosing a layout, which decides the number of cells and how they are arranged. There are two sizes and twelve layouts in total; switch between them with "Large menu (taller)" and "Small menu (shorter)" at the top:
| Size | Layouts |
|---|---|
| Large menu (taller) | 6 cells (3×2), 4 cells (2×2), Top bar + 3 cells, Large left + 2 right, 2 rows, 2 columns, Single full |
| Small menu (shorter) | 3 cells in a row, 2 cells in a row, Large left, small right, Small left, large right, Single full |
Click a layout to open the new menu screen, which has the same fields as the editor. If you change your mind, click "Cancel and back to list" at the bottom right.
The new menu screen has no "Sync to LINE" button: save first, then sync from "More actions" in the list.
The layout cannot be changed after creation
Once chosen, it cannot be changed. To use a different layout, add a new menu and delete the old one yourself. So decide how many buttons you need before choosing.